Fig. 1a: Pre-op clinical view of tooth #46 showing the old composite restoration and the extent of the carious lesion. (All images: Drs Simona Chirico and Massimo Gagliani)
The endodontic treatment of severely compromised teeth and their restoration are everyday challenges in dental practice. The advent of high-performance endodontic instruments, chairside CAD/CAM technologies and related materials has considerably reduced the rehabilitation time for these teeth, allowing treatment to be performed in a single visit. A same-visit workflow may offer a useful alternative to the conventional workflow. It introduces a different approach in which the tooth is prepared for restoration and the digital impression is taken before endodontic treatment.
After the complete removal of carious tissue or damaged restorations, the clinician prepares the tooth for the indirect restoration and seals the dentine, except for the access cavity. At the end of this phase, a digital impression is taken, and the restoration is designed and milled from the resulting data. During this period, the root canal treatment can be completed, and then the restoration can be luted, in some cases without removing the dental dam.
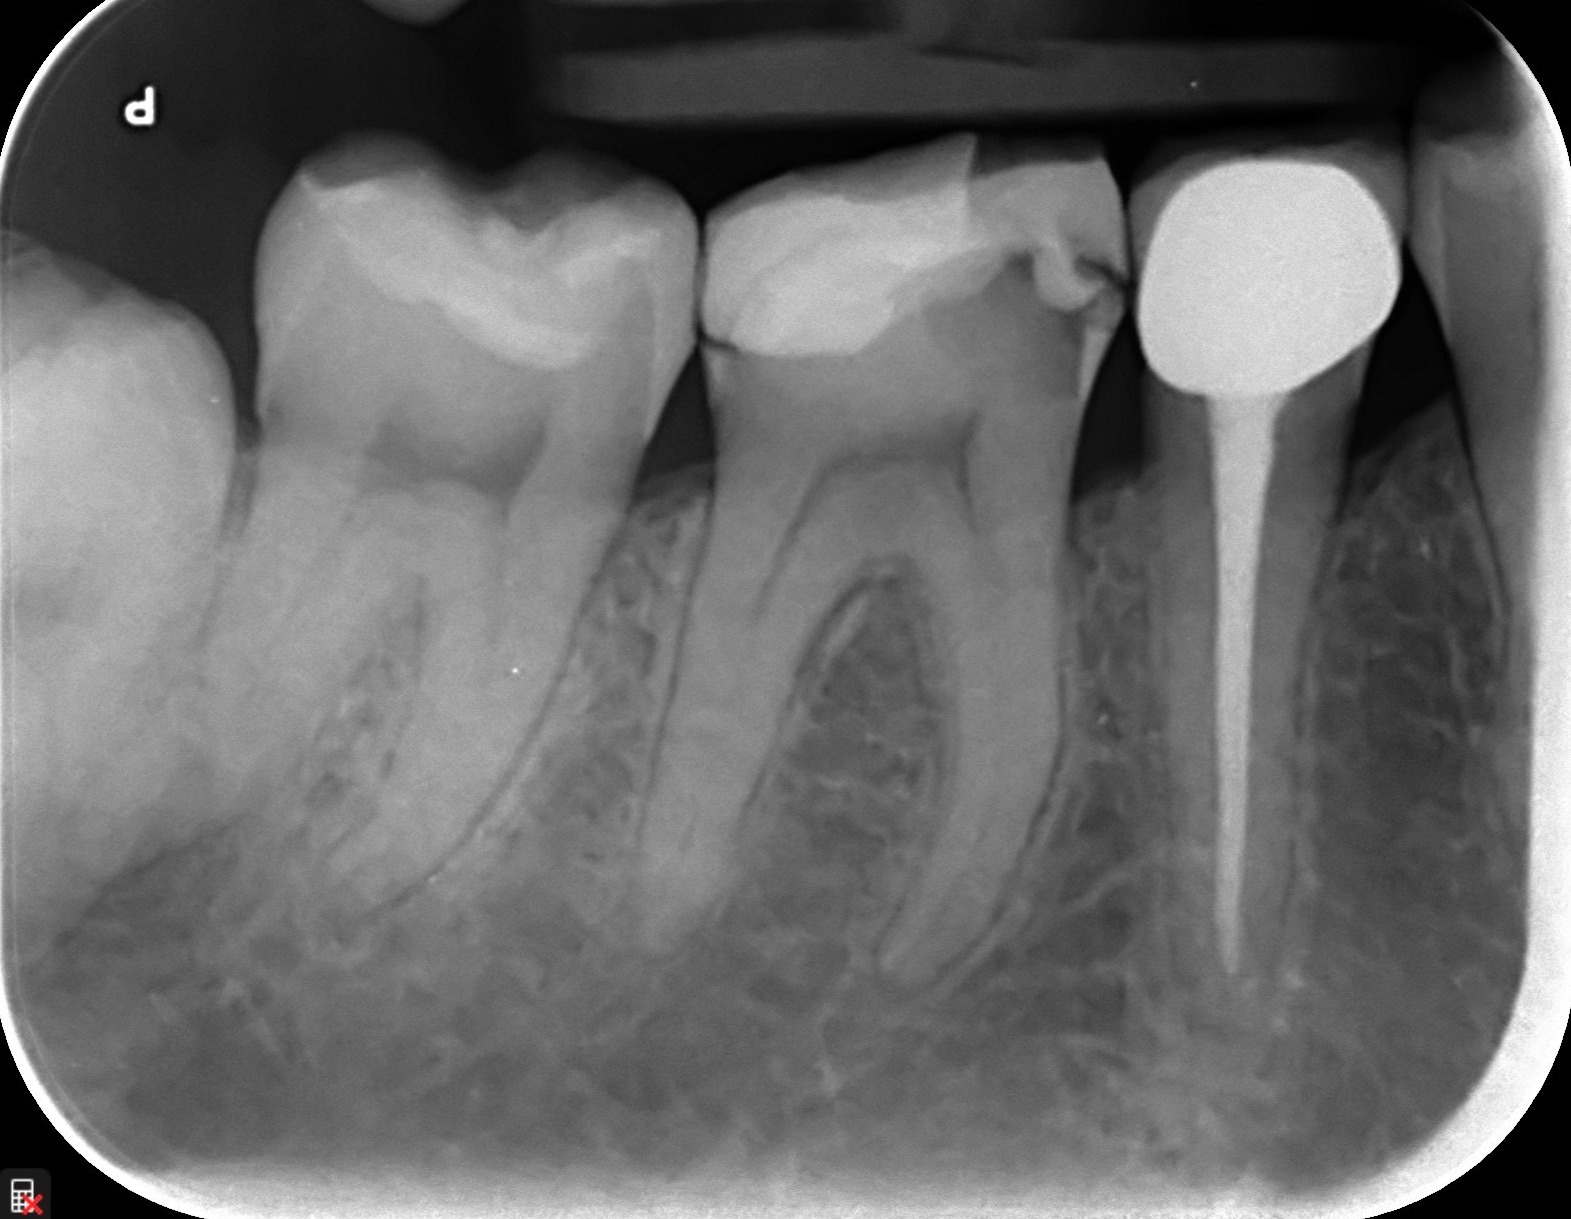
Fig. 1b: Radiographic view of tooth #46 showing the old composite restoration and the extent of the carious lesion.
The criteria for case selection are:
teeth with deep carious lesions and pulpal involvement requiring endodontic treatment;
teeth in which caries has caused the loss of at least one cusp and an indirect restoration is indicated;
teeth requiring endodontic retreatment;
teeth with periapical lesions requiring endodontic treatment or retreatment; and
the patient’s willingness to undergo a long appointment.
This workflow may be unsuitable in cases involving:
a preparation margin that would violate the supracrestal tissue attachment;
acute or chronic periapical abscess;
temporomandibular disorder; and
vertical root fracture.
The potential advantages of this workflow can be summarised as follows:
immediate dentine sealing before the use of irrigating solutions may support improved adhesive bonding;
contamination of adhesive surfaces by endodontic sealer may be avoided;
the access cavity can be better controlled during shaping and obturation;
the single-visit workflow reduces chair time for the patient and the clinician; and
in a single-visit workflow, the restoration may enhance the overall seal of the endodontic space.
Endodontic instruments designed to support conservative shaping, such as HyFlex EDM (COLTENE), are recommended for this workflow. The resin composite CAD/CAM block BRILLIANT Crios (COLTENE), used for single-tooth indirect restorations, offers strong mechanical performance and aesthetics, supporting integration with the surrounding tissue. Luting can be carried out with BRILLIANT EverGlow composite in paste or flowable consistency, facilitating excess removal and polymerisation.
Case 1
A 38-year-old female patient presented for an emergency appointment owing to pain and heightened sensitivity to heat and cold in the mandibular right quadrant. After clinical and radiographic examination, a large carious lesion with pulpal involvement was diagnosed in tooth #46, which had an old composite restoration (Figs. 1a & b). Poor oral hygiene and acute gingivitis were also observed. As the patient was due to give birth in three weeks, a single-visit digital workflow combining endodontic treatment and CAD/CAM restoration was chosen.
Fig. 2: Tooth #46 after removal of the old restoration under dental dam isolation to assess the extent of the carious lesion.
Fig. 3: Tooth #46 after caries removal, margin elevation and refinement of the cavity preparation for the planned endocrown.
Phase 1: Isolation and cavity preparation
After dental dam isolation of the quadrant, the old restoration was removed to evaluate the extent of the carious lesion (Fig. 2). The carious tissue was then removed, deep margin elevation was performed, the cavity preparation was refined for the planned endocrown and the access cavity was prepared for the subsequent endodontic treatment (Fig. 3). All the margins were clearly visible, and the contour of the future endocrown was not expected to be modified by the root canal treatment procedures.
Fig. 4a: Digital impression workflow: intra-oral scan of the mandibular right quadrant with tooth #46 prepared.
Fig. 4b: Intra-oral scan of the opposing quadrant.
Fig. 4c: Intra-oral scan of buccal scan of the occlusal relationship.
Fig. 5a: CAD workflow for tooth #46: definition of the preparation margin.
Fig. 5b: Preview of the endocrown design.
Fig. 5c: Positioning of the restoration in the virtual block before milling.
Phase 2: Impression taking and fabrication of the restoration
In this case, the dental dam was removed to allow the patient a short break. In most cases, however, it can remain in place during the digital impression procedure.
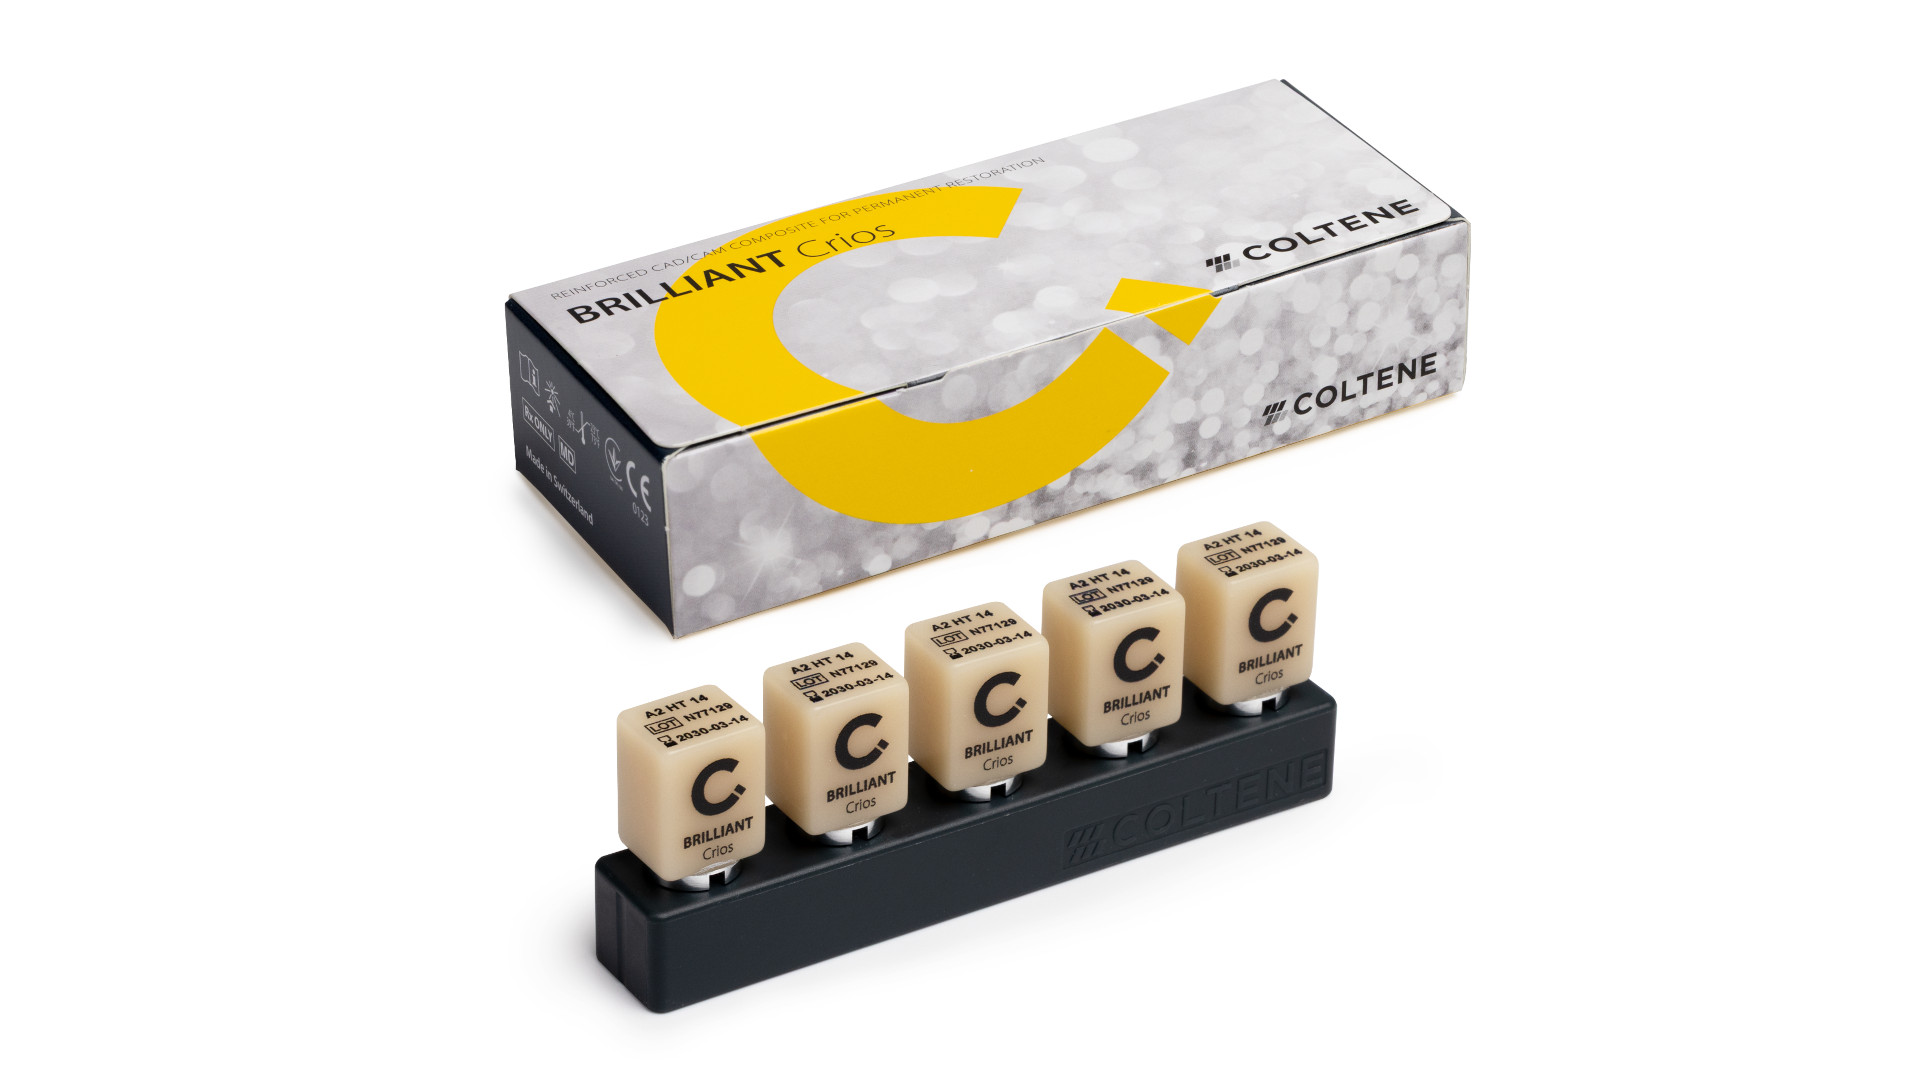
Fig. 6: BRILLIANT Crios resin composite CAD/CAM blocks in Shade A2 and high translucency.
PTFE tape was placed on the floor of the pulp chamber to a height of about 1.5 mm to simulate the thickness of the flowable composite that would be placed after completion of endodontic treatment. Once correct temporary blocking out of the canal orifices had been verified, the chairside digital protocol began with intra-oral scanning using CEREC Primescan (Dentsply Sirona). After the tooth to be treated, restoration type and material had been selected, intra-oral scans were taken of the mandibular right quadrant and opposing quadrant, followed by a buccal scan of the occlusal relationship (Figs. 4a–c).
Once intra-oral scanning had been completed, the preparation margin of tooth #46 was defined in the CEREC software, the endocrown design was previewed and the restoration was positioned in the virtual block before milling (Figs. 5a–c). BRILLIANT Crios in Shade A2 and high translucency was selected for fabrication of the endocrown (Fig. 6), and milling was begun. In this way, the milling unit was able to fabricate the restoration while the endodontic treatment was being performed. Milling took about 9 minutes.
Phase 3: Endodontic treatment
Root canal shaping was carried out with the medium HyFlex EDM shaping set (25 mm), and the canals were irrigated with CanalPro sodium hypochlorite (COLTENE) after each step. After completion of instrumentation, the canals were dried using Greater Taper 0.04 paper points (COLTENE). ROEKO GuttaFlow bioseal obturation material (COLTENE) was then applied, and obturation was completed by vertical warm compaction with HyFlex EDM gutta-percha points.
Fig. 7a: Endodontic treatment of tooth #46: after obturation.
Fig. 7b: Endodontic treatment of tooth #46: application of a layer of flowable composite to the floor of the pulp chamber before luting of the endocrown.
Fig. 8a: Milled resin composite endocrown after characterisation and polishing, occlusal surface.
Fig. 8b: Milled resin composite endocrown after characterisation and polishing, intaglio surface.
Fig. 9a: Sand-blasting of the intaglio surface of the endocrown.
Fig. 9b: Application of a universal adhesive.
Fig. 10a: Etching of the prepared tooth under dental dam isolation.
Fig. 10b: Application of a universal adhesive.
Fig. 11a: Endocrown after luting but before removal of excess material.
Fig. 11b: Endocrown after finishing and polishing under dental dam isolation.
Fig. 12: Clinical occlusal view of the luted endocrown on tooth #46 after removal of the dental dam.
Fig. 13a: Clinical follow-up view of tooth #46 after endodontic treatment and restoration.
Fig. 13b: Radiographic follow-up view of tooth #46 after endodontic treatment and restoration.
Phase 4: Restoration
After endodontic treatment (Fig. 7a), a layer of BRILLIANT EverGlow Flow was applied to the floor of the pulp chamber (Fig. 7b). A try-in of the restoration was performed, and the endocrown was then finished and polished (Figs. 8a & b).
The restoration was then sand-blasted and ONE COAT 7 UNIVERSAL adhesive (COLTENE) applied (Figs. 9a & b). After dental dam isolation of the quadrant, tooth #46 was etched and ONE COAT 7 UNIVERSAL applied (Figs. 10a & b).
At this point, the endocrown was luted using heated BRILLIANT EverGlow (Shade A2/B2). After removal of excess material, light polymerisation was carried out for 90 seconds per surface: occlusal, buccal and lingual. Polishing was then performed using the DIATECH ShapeGuard Composite Polishing Plus Kit (COLTENE; Figs. 11a & b). After removal of the dental dam, a clinical check of the endocrown was performed (Fig. 12).
The total treatment time for this single-visit digital workflow was 2 hours and 30 minutes. Ten days after treatment, the patient returned for a clinical and radiographic review to evaluate the integration of the restoration with the surrounding tissue (Figs. 13a & b).
Case 2
A 62-year-old male patient presented for an emergency appointment owing to pain and heightened sensitivity to heat and cold in the mandibular left quadrant. After clinical and radiographic examination, a large carious lesion with pulpal involvement was diagnosed in tooth #36, which had an old amalgam restoration (Figs. 14a & b). The patient was offered single-visit treatment following a digital workflow, which he accepted.
Fig. 14a: Pre-op clinical view of tooth #36 showing the old amalgam restoration and the extent of the carious lesion.
Fig. 14b: Pre-op radiographic views of tooth #36 showing the old amalgam restoration and the extent of the carious lesion.
Phase 1: Initial digital impression taking
The session began with intra-oral scans of the mandibular left quadrant, opposing quadrant and occlusal relationship (Figs. 15a–c). Starting with an intra-oral scan is important because, after the tooth has been prepared and the new situation has been captured, the software can recognise and match the two datasets.
Fig. 15a: Initial intra-oral scans of the mandibular left quadrant.
Fig. 15b: Initial intra-oral scans of the mandibular opposing quadrant.
Fig. 15c: Initial intra-oral scans of the mandibular occlusal relationship.
Fig. 16: Isolation of the mandibular left quadrant with a dental dam before removal of the old restoration.
Fig. 17: Tooth #36 after removal of the old amalgam restoration, cavity preparation and access cavity creation.
Fig. 18a: Checking of the pulp chamber depth with a probe.
Fig. 18b: Checking of the pulp chamber to guide placement of a 1–2 mm layer of PTFE tape to simulate the subsequent flowable composite layer.
Fig. 19a: CAD workflow for tooth #36: matching of the intra-oral scan of the prepared tooth #36 under dental dam isolation with the initial scan.
Fig. 19b: CAD workflow for tooth #36: definition of the preparation margin.
Fig. 19c: CAD workflow for tooth #36: preview of the endocrown design.
Fig. 19d: CAD workflow for tooth #36: positioning of the restoration in the virtual block before milling.
Fig. 20a: Endodontic treatment of tooth #36: after obturation.
Fig. 20b: Application of a layer of flowable composite to the floor of the pulp chamber before luting of the endocrown.
Phase 2: Isolation and cavity preparation
After dental dam isolation of the quadrant (Fig. 16), the amalgam restoration was removed, and the mesial margin was elevated. The cavity preparation was then completed for the planned endocrown, and the access cavity was created for endodontic treatment (Fig. 17). Phase 3: Final digital impression taking and fabrication of the restoration
Before the digital impression, PTFE tape was applied to the floor of the pulp chamber (Figs. 18a & b). Once correct temporary blocking out of the canal orifices had been verified, tooth #36 was digitally removed from the initial scan, and the prepared tooth was scanned under dental dam isolation.
The new scan was then matched to the initial one using the adjacent teeth as references. The preparation margin of tooth #36 was then defined in the CAD software, the endocrown design was previewed and the restoration was positioned in the virtual block before milling (Figs. 19a–d). The process then continued with milling of the restoration, which took about 11 minutes.
Fig. 21a: Milled resin composite endocrown after characterisation and polishing, occlusal.
Fig. 21b: Milled resin composite endocrown after characterisation and polishing intaglio surfaces.
Fig. 22b: Sand-blasting of the intaglio surface of the endocrown.
Fig. 22b: Application of a universal adhesive.
Phase 4: Endodontic treatment
Root canal shaping was carried out with the medium HyFlex EDM shaping set (25 mm), and the canals were irrigated with CanalPro sodium hypochlorite after each step. After completion of instrumentation, the canals were dried using Greater Taper 0.04 paper points. ROEKO GuttaFlow bioseal was then applied, and obturation was completed by vertical warm compaction with HyFlex EDM gutta-percha points. Phase 5: Endocrown luting procedure
After endodontic treatment (Fig. 20a), a layer of BRILLIANT EverGlow Flow was applied to the floor of the pulp chamber (Fig. 20b).The endocrown was tried in, finished and polished (Figs. 21a & b). The restoration was then sand-blasted and ONE COAT 7 UNIVERSAL applied (Figs. 22a & b). The tooth was etched and ONE COAT 7 UNIVERSAL applied (Fig. 23).
At this point, the endocrown was luted using heated BRILLIANT EverGlow (Shade A2/B2). After removal of excess material, light polymerisation was carried out for 90 seconds per surface: occlusal, buccal and lingual. Polishing was then performed using the DIATECH ShapeGuard Composite Polishing Plus Kit (Figs. 24a & b). After removal of the dental dam, a clinical and radiographic check of the endocrown was performed (Figs. 25a & b). The total treatment time for this workflow was 2 hours and 20 minutes.
Fig. 23: Tooth #36 after etching and application of a universal adhesive.
Fig. 24a: Endocrown after seating with heated composite.
Fig. 24b: Endocrown after finishing and polishing under dental dam isolation.
Fig. 25a: Clinical post-op view of tooth #36 after endodontic treatment and restoration.
Fig. 25b: Radiographic post-op view of tooth #36 after endodontic treatment and restoration.
Conclusion
These two cases illustrate how endodontic treatment and chairside CAD/CAM of indirect restorations can be integrated into a single appointment in selected clinical situations. By preparing and scanning the tooth before root canal treatment, the restoration can be designed and milled while the endodontic procedures are completed. This approach can help reduce treatment time and allows the immediate restoration of the endodontically treated tooth.
Orifice opener, glide path file, shaping file and finishing file—for classic endodontic treatment, a compact system of nickel–titanium (NiTi) files is ...
Modern endodontics is no longer an isolated discipline. It marks the start of a restorative process that extends all the way to the final composite layer. ...
COLOGNE, Germany: As this year’s International Dental Show (IDS) unfolds, the COLTENE Group and its latest dental solutions remain at the forefront of ...
The patient was referred for root canal treatment (RCT) of tooth #36, the referring dentist having had difficulty in locating the root canal orifices. The ...
LANGENAU, Germany: Which basic utensils are part of any well-laid table? Soup spoons, knives, forks and dessert spoons are the widely accepted standard, ...
LANGENAU, Germany: In endodontics, some challenges go deep—literally. Long roots, deep cavities or large jaws require instruments with greater reach. ...
LANGENAU, Germany: COLTENE has expanded the shade range of its BRILLIANT direct composites and CAD/CAM composite blocks with new bleach shade options. ...
“Faster, higher, stronger”—this motto certainly no longer applies only to the Olympic Games. How can certain tasks be performed even more precisely, ...
Education
Live webinar Tue. 9 February 2027 11:00 am EST (New York)



 Brazil / Brasil
 Canada / Canada
 Latin America / Latinoamérica
 USA / USA
 Austria / Österreich
 Bosnia and Herzegovina / Босна и Херцеговина
 Bulgaria / България
 Croatia / Hrvatska
 Czech Republic & Slovakia / Česká republika & Slovensko
 France / France
 Germany / Deutschland
 Greece / ΕΛΛΑΔΑ
 Hungary / Hungary
 Italy / Italia
 Netherlands / Nederland
 Nordic / Nordic
 Poland / Polska
 Portugal / Portugal
 Romania & Moldova / România & Moldova
 Slovenia / Slovenija
 Serbia & Montenegro / Србија и Црна Гора
 Spain / España
 Switzerland / Schweiz
 Turkey / Türkiye
 UK & Ireland / UK & Ireland
 China / 中国
 India / भारत गणराज्य
 Pakistan / Pākistān
 Vietnam / Việt Nam
 ASEAN / ASEAN
 Israel / מְדִינַת יִשְׂרָאֵל
 Algeria, Morocco & Tunisia / الجزائر والمغرب وتونس
 Middle East / Middle East


 Dr. Pierre Marin, Dr. Antoine PopelutRegister now1CELive webinar
 Dr. Sinan GhishanRegister now1CELive webinar
 Dr. Sonia PresenciaLive webinar
 Dr. John Tsourounakis DDS, Cert. Perio, MS, FRCD(C)Register now1CE










To post a reply please login or register