In dental implantology, the optimal and truly passive fit of the framework is essential for the long-term success of a restoration owing to the physiology of bone tissue around implants. For a multiple-unit implant-supported restoration, the traditional pouring technique is rather complex and challenging. The difficulty of achieving a passive fit is directly correlated to the number of components used and the volume of the framework. CAD/CAM technology provides such a high level of accuracy that it has revolutionised the field of restorative dentistry.
Today, many implant manufacturers collaborate with industrial companies to develop state-of-the-art machining solutions for their implant-supported frameworks. In that regard, the concept developed by Simeda (Anthogyr) is innovative and supported by many years of proven success in the fabrication of CAD/CAM dental restorations. The major advantage of CAD/CAM technology is that it guarantees a highly accurate and predictable fit (< 10 μ). This clinical case report demonstrates the high potential of this novel digital solution.
Patient presentation
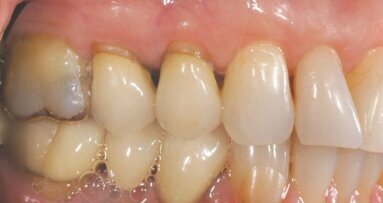
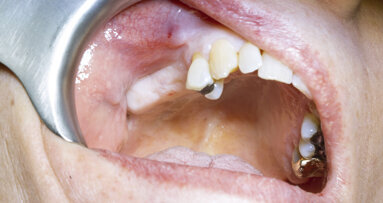
The male patient was a former smoker and 51 years old when the treatment was initiated. He presented with high blood pressure and took Tahor (Pfizer) on a daily basis. In addition, he had been on Kardegic (Sanofi) therapy since a heart attack in 2005. For functional and aesthetic reasons, he wanted a fixed prosthesis in his maxillary arch (Figs. 1a & b).
embedImagecenter("Imagecenter_1_1419",1419, "large");
Debridement and pre-implant surgery
Owing to the periodontal condition of his remaining maxillary teeth, all of them were atraumatically removed. Then, mechanical debridement was performed through alveolar curettage and copious irrigation with Betadine. A maxillary complete overdenture was fabricated and placed on the same day of the extractions.
After a healing period of four months, DentaScan images (GE Healthcare) were obtained to evaluate the bone height. The scans showed significant bone resorption in the posterior sections of the maxillae (Figs. 2a–c): SA-4, according to Misch’s classification, since the residual ridge height was less than 5 mm. Sinus grafting was deemed necessary and implant placement had to be delayed by five to six months, until complete healing and good initial stability had been achieved.
Bilateral sinus lift was performed under local anaesthesia from a lateral approach using the technique described by Tatum. The Schneiderian membrane was lifted gently. As there were no perforations, platelet-rich fibrin was used for coverage of the sinus floor. Maxgraft (botiss biomaterials) allografts were placed to elevate the maxillary sinus floor, and then covered with a Bio-Gide (Geistlich) collagen membrane and platelet-rich fibrin.
After a healing period of five months, the patient underwent a CT scan wearing a scan prosthesis of acrylic resin and commercially available teeth for visibility of the desired tooth location in the CT images (Fig. 3). The CT examination showed adequate bone volume in the grafted posterior regions and an even sinus floor with homogeneous allografted areas. The dome-like shape of the vestibulo-lingual crosssections was indicative of the absence of material leakage into the maxillary sinuses (Fig. 5a).
Osteogenic activation
I performed osteogenic activation of the processed maxgraft bone used for sinus lift using the technique described by Scortecci. A trans-parietal approach was used for insertion of the Bone Matrix Osteotensor (Victory) after a minimally invasive flapless protocol (Fig. 4). Endosteal stimulation results in osteogenic activation and allows evaluation of the mechanical strength of the grafted areas by probing. Owing to this simple and minimally invasive technique, the initial quality of the future recipient bone site is easily assessed. These techniques have been successfully used in orthopaedics for ten years. In view of the excellent response to osteogenic activation, it was decided that implants would be placed 45 days later.
Treatment planning
The case was planned in the SIMPLANT (DENTSPLY Implants) treatment planning software. The scan prosthesis is critical for determination of the correct position and axial alignment of the implants; visualisation of the emergence profile; and determination of the size, position and axial alignment of the abutments. Furthermore, it allows optimal use of the available bone height. At this stage, special attention should be paid to 3-D positioning of the implants and particularly to the emergence profile in order to facilitate the fabrication process of the final restoration. Straight or angled conical abutments are now clearly visible on the vestibulo-lingual cross-sections. Ten Axiom PX implants (Anthogyr) were planned for a maxillary screw-retained bridge restoration (Figs. 5a–c).
Implant placement
Implant placement was performed under local anaesthesia using the case-specific surgical guide. For this patient, I used a specific implant design (Axiom PX, Anthogyr) with symmetrical double-lead threads (self-drilling and self-tapping) and a reverse conical neck (Fig. 6). Its unique design, combined with a special drilling protocol, promotes bone conden sation even in soft bone, ensuring excellent initial fixation. The BCP (biphasic calcium phosphate) sandblasting technique yields an implant surface with superior osteoconductive properties that positively influence the development of osteoblastic cells in the early stage of osseointegration. A flapless technique was used for implant placement. The flapless technique has definite advantages: preservation of the subperiosteal blood vessels, and improved patient comfort owing to a shorter operating time and simple post-operative care.
Temporary bridge and immediate loading
It was agreed with the patient that the implants would be immediately loaded, provided that good initial stability was obtained. The temporary removable prosthesis would be worn for a limited period. Fortunately, adequate stability was achieved, allowing for immediate loading. Each implant (except #27) was torqued to 35 Ncm or more. On the same day, an impression was made using the pick-up technique, with a previously prepared impression tray. First, the final straight conical abutments were hand tightened into the implants using a torque of 15 Ncm. They were intended to accommodate the screwretained provisional and then the final screw-retained prosthesis.
The Axiom PX implant system offers two major advantages: platform switching and indexing trilobe Morse taper connection. The latter greatly facilitates abutment placement. A tight stable connection guarantees integrity of the soft tissue (Fig. 8). In the laboratory, the master model with the embedded analogue was used to fabricate a master plaster cast. A high-rigidity cobalt–chromium and resin temporary bridge was fabricated, tried in, and transferred to the patient’s mouth 48 hours after the implants had been placed. This provisional device would serve as an external fixator during osseointegration of the implants.
A control radiograph was taken to confirm the passive fit of the framework. The temporary bridge was hand tightened to a torque of 10 Ncm. The occlusion was accurately adjusted (Figs. 7a-c). The patient wore the temporary bridge for six months. During that period, a number of parameters were evaluated, including occlusion, osseointegration status, oral hygiene, mastication, phonetics, aesthetics and lip support. The temporary bridge should be rigid (framework) and easily removable (screw fixation). Site #27 healed uneventfully, protected as it was from mechanical stress.
Final bridge
At the end of the six-month healing period, preparation for the final restoration began. Wearing the temporary bridge had allowed adjustment of the abovementioned parameters (e.g. aesthetics, phonetics and lip support) and validation of the vertical dimension and intermaxillary relationship.
The temporary bridge was removed, an implant stability percussion test was performed, and control radiographs were taken. The straight conical abutments that had been placed concomitant with the implants were tightened to 25 Ncm (as recommended by the manufacturer), except abutment #23, which was angled (Fig. 8).
An impression of the final bridge was taken with the same impression tray used for the temporary bridge. Pick-up transfer copings were interconnected using LuxaBite resin (DMG), and the impression was made using Impregum (3M ESPE). The master model, including the conical abutment analogues and silicone soft tissue (representing the patient’s gingiva), was fabricated and then validated in the dentist’s office via a wax bite block (into which extra-hard plaster material was poured). The wax bite block was then tried in (Figs. 9a–d).
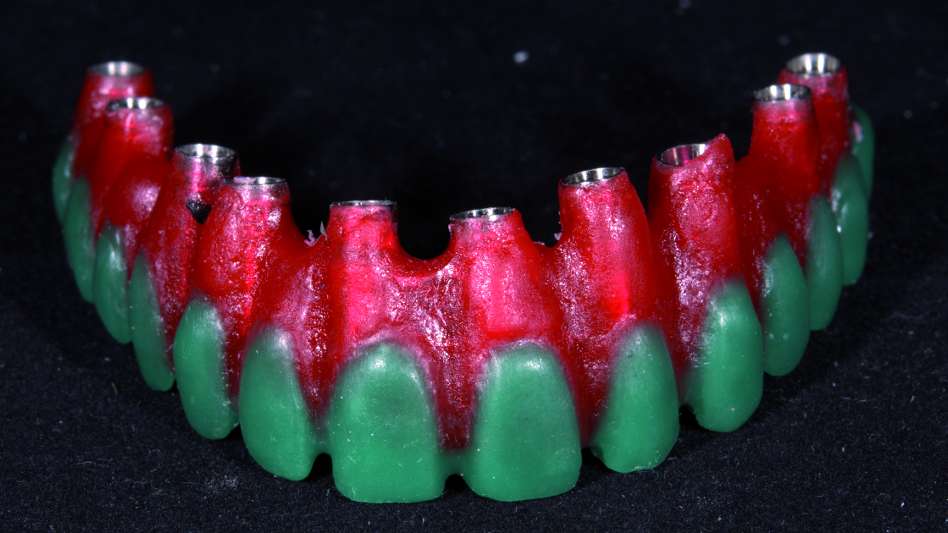
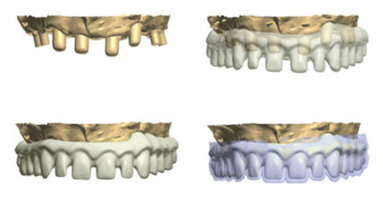
Using silicone indices (vestibular, occlusal and palatal) from the temporary bridge, a wax-up was fabricated in the laboratory (Fig. 10). The wax-up had to meet the aesthetic demands of the patient and be an exact replica of the temporary bridge (both anatomically and aesthetically). The validated master model and wax-up were sent to the SIMEDA machining centre, where the master model was scanned and a CAD model was designed (Figs. 11a–d). A PDF 3-D file is used to validate the design, after which the manufacturing process can be initiated. All pieces are machined from titanium blocks using high-precision five-axis milling machines (Figs. 12a–c).
Titanium is a lightweight material and, more importantly, it is highly biocompatible and has superior mechanical properties. It is four times lighter than commonly used semiprecious alloys. Actually, it is the lightest metal used in dentistry. Furthermore, titanium is a self-passivating metal: it readily reacts with oxygen in air to form a tough layer of oxide, which protects against corrosion. Titanium is known to resist corrosion and chemical attacks extremely well. Furthermore, it is bactericidal, a key advantage for dental implants. Material density is a crucial factor in implantology. We believe that the weight of a maxillary implant-supported prosthesis is the most important factor for the outcome of the restoration.
A few days later, we received the framework for try-in. It had a perfect passive fit and was returned to the laboratory for veneering. The metal preparation in the laboratory entailed sandblasting, titanium etching and the application of opaque porcelain to conceal the metal core. The bisque-baked restoration was then tried in to allow the patient to validate the aesthetics of the restoration. This step is necessary to assess static and dynamic occlusion and perform minor adjustments (Figs. 13a–g). The bisque-baked restoration was then returned to the laboratory for fine tuning and glazing.
CAD/CAM benefits
Although conventional casting techniques have evolved, they are still fraught with inaccuracies owing to the nature of the materials and to their handling. This includes the risk of errors during investment processing, risk of metal deformation and poor metal homogeneity. The CAD/CAM technologies used for producing metal frameworks are essential to the quality of the final restoration (Fig. 13i). The CT scan data is converted into a format that allows the 3-D images to be utilised by the selected treatment planning software. The case is then planned in the software.
The CAD software has databases that allow the creation of virtual models for the desired restoration using different materials, including zirconia, titanium, cobalt–chromium, IPS e-max and PMMA.
If the dental laboratory has its own scanner, an STL file is sent directly to the production centre by e-mail. Otherwise, both the model and the wax-up are forwarded to the production centre by courier.
If the computer settings are correct, one is ensured of perfect reproducibility in the manufacturing process and consistency in the result (i.e. a truly passive framework fit). Optimal setting of the coping thickness parameter or the pontic connection parameter may prevent torsion or deformation of the framework during firing of the ceramic. Subtractive manufacturing, combined with digital modelling, eliminates the risk of alteration of the material structure. The resulting metal framework will have optimal homogeneity and density.
As regards fabrication of implant superstructures, machining is the technique of choice for achieving high precision and near passive fit. Practitioners can expect consistent and reproducible results, excellent framework fit, and regular, accurate prosthetic seals.
Conclusion
Today, dental laboratories are using high-tech scanning equipment, which allows digitisation of the master model (to determine the implant index) and the wax-up. CAD/CAM offers a level of quality and accuracy unsurpassed by any of the traditional techniques. Passive fit, which is critical to the outcome of an implant-supported prosthesis, is a determinant of the long-term success of a restoration. Passive fit of the framework for a long-span restoration is much easier to achieve and reproduce with CAD/CAM than with the traditional pouring techniques.
The use of CAD/CAM machining for implant-supported restorations guarantees a highly accurate and predictable framework fit (< 10 μ). In addition, machining centres can produce restorations using fully biocompatible materials, such as titanium and zirconia. In order to take advantage of the accuracy of CAD/CAM, using safe and reliable implant systems with superior biological and biomechanical characteristics is required.
CAD/CAM will soon be essential. Current CAD/CAM solutions are easily accessible to any dentist and do not require fundamental changes to his or her workhabits.
Acknowledgement: Special thanks to G. Nauzes and J. Bellany, laboratory technicians at Socalab.
Editoral Note: This article was published in CAD/CAM–international magazine of digital dentistry 03/2014.
NEW YORK, U.S.: Innovation and technology are moving at a rapid pace, with many of the developments influencing the role of implant therapy in the dental ...
No-preparation ultrathin veneer is one of the most minimally invasive restorations. Its thickness ranges from 0.3 to 0.5 mm. In the right circumstances ...
Today’s consumers are always searching for the ultimate bargain, even when it comes to their dental care. They want high-quality results and minimally...
CAD/CAM technology and materials are currently used in a number of clinical applications, including the fabrication of indirect restorations. CAD/CAM gives ...
This article describes the adaptation of tried and tested fixed prosthesis work protocols to new CAD/CAM techniques. Based on a complete upper and lower ...
In the first part of this article (published in CAD/CAM 1/2017) the different phases of diagnostics, planning and implantological treatment were presented. ...
Patients who visit our clinic and wish to receive prosthetic treatment are frequently unaware of the possibilities that modern medicine has to offer. ...
In today’s fast-paced world, instant gratification is expected to be synonymous with worthwhile results. This also applies to dental treatments. While...
Dental implants are widely accepted as a successful method for replacing missing teeth. The success of dental implant treatment depends on many factors, ...
Dr. Gary Hack is an associate professor at the University of Maryland School of Dentistry, where he teaches in the Department of Advanced Oral Sciences and ...
Live webinar
Tue. 24 February 2026
1:00 pm EST (New York)
Prof. Dr. Markus B. Hürzeler
Live webinar
Tue. 24 February 2026
3:00 pm EST (New York)
Prof. Dr. Marcel A. Wainwright DDS, PhD
Live webinar
Wed. 25 February 2026
11:00 am EST (New York)
Prof. Dr. Daniel Edelhoff
Live webinar
Wed. 25 February 2026
1:00 pm EST (New York)
Live webinar
Wed. 25 February 2026
8:00 pm EST (New York)
Live webinar
Tue. 3 March 2026
11:00 am EST (New York)
Dr. Omar Lugo Cirujano Maxilofacial
Live webinar
Tue. 3 March 2026
8:00 pm EST (New York)
Dr. Vasiliki Maseli DDS, MS, EdM


 Austria / Österreich
 Bosnia and Herzegovina / Босна и Херцеговина
 Bulgaria / България
 Croatia / Hrvatska
 Czech Republic & Slovakia / Česká republika & Slovensko
 France / France
 Germany / Deutschland
 Greece / ΕΛΛΑΔΑ
 Hungary / Hungary
 Italy / Italia
 Netherlands / Nederland
 Nordic / Nordic
 Poland / Polska
 Portugal / Portugal
 Romania & Moldova / România & Moldova
 Slovenia / Slovenija
 Serbia & Montenegro / Србија и Црна Гора
 Spain / España
 Switzerland / Schweiz
 Turkey / Türkiye
 UK & Ireland / UK & Ireland
 Brazil / Brasil
 Canada / Canada
 Latin America / Latinoamérica
 USA / USA
 China / 中国
 India / भारत गणराज्य
 Pakistan / Pākistān
 Vietnam / Việt Nam
 ASEAN / ASEAN
 Israel / מְדִינַת יִשְׂרָאֵל
 Algeria, Morocco & Tunisia / الجزائر والمغرب وتونس
 Middle East / Middle East













To post a reply please login or register